Introduction to Vacuum Silage from Grass
Vacuum Compressed Silage is a small scale process that can produce grass silage of very high quality, at relatively low cost and on one cut per year. This is suitable for small farms of between 50 to 200 acres that conserve grass from about 2 to 50 acres. This process only needs one person and does not rely on contractors and does not involve large machinery. It is particularly suitable for organic livestock farms.
Please note that this website is a personal account and all details need to be checked against authoritative information before making any economic use of them. No liability can be accepted for consequences of using information on this website.
Keywords Vacuum Silage One Person Silage High Quality Silage Organic Silage Strip-seal Vacuum Compressed Silage One Man Silage System Rapid Fermentation Lactic Acid Fermentation Silage Sheet Seam (new product)
Information about access to new Silage Sheet Seam is available at the following email address CDavidLanceSilage@gmail.com. This is being developed to replace Strip-seal. There is a dedicated page for Silage Sheet Seam. SilageSheetSeam for quick ID.
Silage making in general
Silage is a conservation method that can be used for various fodder crops. It is an alternative to making hay. It is best known for conserving grass and maize, but is also used for other fodder crops. Silage making is a pickling process that conserves the feed crop so that it can be used to feed livestock whenever it is needed. The harvested crop is compacted to create anaerobic conditions.
There are different ways of achieving the correct fermentation and compaction of the crop and different ways of storing the silage. The Vacuum Compressed Silage method uses atmospheric pressure to compress the crop and the rapid evacuation creates the anaerobic conditions for lactic acid pickling of the crop. Vacuum silage does not require additives for fermentation, if correctly made.
Other methods include large clamp yards to contain a crop and compact it with machinery running over it. Another method involves machinery compacting crops into bales and wrapping or bagging bales to contain the silage. Silage can also be made and stored in “Silos” by loading the crop into a large cylinder container. All of these groups of methods need silage to be covered or contained to prevent decay and usually involve the use of agricultural contractors and increasingly large machinery.
History of Vacuum Silage
The details of the method on this website were developed by David John Lance at Yalland Farm in Devon (UK) on a hill farm in the Dartmoor National Park. It is based on an idea that came from New Zealand in 1964.
Two New Zealanders named J L Doutre and C G Jowsey developed the first version of this technique. Their ideas were an answer to particularly difficult wet seasons in new Zealand when silage making had resulted in poor quality fodder. It was brought to the UK in 1964 by R Walley of Cheshire and was demonstrated in Devon in 1965 by George Jowsey.
The method extracts air from a sealed heap of grass and that both preserves and compacts the grass being conserved. The method was adopted on 76 farms in Cornwall, Devon and Dorset in 1965. A paper was produced by Beynon and Godsall in 1966 from Exeter University describing the technique and providing an economic evaluation.
David Lance used the method from that time until he retired from farming in 2002. Many refinements and practical improvements have been made in that time.
Very few farmers use this technique now, mainly because it is easier to hire contractors for this work, but also because many farms are larger than they were in the 1960's. This technique is generally not suitable for farms over 200 acres. It is suitable for a one person operation where time and attention to details are not limited.
Smaller scale silage conservation tends to use big bales now (2020) rather than Vacuum Silage. There are some disadvantages of big bales and those may lead to Vacuum Silage being a viable alternative.
A lot has been learnt about the fermentation process and the need for rapid pickling in anaerobic conditions. To promote the correct fermentation lactic acid producing bacteria are usually added to wilted grass as it is chopped into forage trailers. This has been the practice for more than 60 years in the UK. Additives are not needed for correctly made Vacuum Silage and that makes it useful on Organic farms.
Overview of the Yalland Vacuum Compressed Silage Process
The process starts with picking two good days to make a field of silage. The crop is flail cut into windrows on the first day.
It is collected on the second day by the same flail harvester and blown into a forage trailer. Wilted grass is then built into a shaped heap and sealed between two plastic sheets using strip-seal.
A rigid pipe is sealed into the top sheet and a vacuum pump is used to extract the gases from the heap until the vacuum is 9 inches of Mercury. This results in a hard clamp of sealed grass about a quarter of its original height.
The resulting clamp is allowed to produce Carbon Dioxide for two days and it relaxes to a taller height than when it was evacuated. After two days the gases are allowed to escape by unfastening a short length of strip-seal and then re-sealing.
The top sheet is then protected and weighted down to ensure the security of the silage. The covered clamp can be fenced against stock. The covering is removed in strips when the silage is needed to be carted for feeding animals.
If the details of this process are followed carefully then a 30 % dry matter, high quality, pH 4 silage should be produced. Wastage can be very small as long as the sheets remain intact and the process has been correctly carried out.
Details of the Yalland Vacuum Compressed Silage Process
Timing of the Harvest is important. The growth stage of the grass and the growing history are important for good quality silage. The crop needs to be harvested just before going to seed. The weather needs to have been warm and sunny for at least two days before harvest to produce a build up of sugars in the herbage.
The day of harvest needs to be sunny and dry to wilt the cut grass. A flail harvester (running off the PTO of a 60 hp tractor) is used to cut the grass crop and leave it in windrows starting at 3 pm to maximise sugar content. The grass is then left to wilt until 11 am the next day. Between 2 and 5 acres can be cut depending on the field size. No more than 5 acres should be attempted in one day.
The bottom sheet needs to be cut to size according to the yield of the cut grass crop. Anything that might puncture it from below needs attention. The siting of the heap needs to suit the farm requirements in terms of carting the grass during harvest and later carting the silage for feeding. A collection of weights are needed to keep the sheet in place.
The pick up and collecting of wilted grass on the second day needs to be dry. The flail harvester has its tall directional head on. By using the flail harvester again the grass receives a second chop as it is collected into a forage trailer. Attention is required to keep the grass completely clean ensuring that no soil, nor machinery fluids, nor other contamination is allowed to spoil the grass. Contamination causes waste.
The forage trailer is a moving bed, rear elevator, self-unloading unit running from the tractor PTO. This drops loads onto the bottom sheet from a height of 10 feet. A lot of hand fork work is required to build a stack of grass that will be a good consistent shape. It needs to have steep sides and a domed top, and be about 12 feet tall at the centre by the time it is finished. A clear 1 foot strip of bottom sheet should be clear of grass all around the stack when finished.
A top sheet needs to be cut to size to go over the grass and reach the full extent of the bottom sheet all around the stack. Strip seal is needed long enough to go around the whole perimeter with at least 2 feet overlaps wherever lengths meet.
Strip seal needs to produce a tight seal with either two or four layers of sheet between the core and the outer strip. This is a very physical handwork activity. The top sheet is sealed all around to the bottom sheet by clipping the sheets within strip seal. Where a strip-seal join occurs the second line needs to run as close to the first as possible for about 2 feet.
Grass has to be cleared as you go to remove any obstructions that might compromise the seal. The top sheet has to be reefed many times near corners to match the top sheet to the bottom sheet. Reefing causes three layers of top sheet and one layer of bottom sheet to be within the strip-seal. The top sheet may need to be weighted to allow sealing to be carried out without damaging the sheet, especially if it is windy.
When the sealing is almost complete, a rigid and perforated plastic pipe needs to be inserted through the top sheet on top of the stack and sealed in using tape. The other end needs to be attached to the vacuum pump. Then the final side of the bottom sheet can be sealed below the pipe.
The pump runs off the tractor PTO and is used for as long as needed to achieve a vacuum of 9 inches of Mercury. That vacuum is equivalent to about 9 feet of concrete sitting on the stack. That achieves the compression of the grass and it removes most of the Oxygen.
The hard clamp of grass begins to re-inflate soon after the pump is switched off. As soon as there is no noise from the tractor, the clamp needs to be checked for punctures. This means looking and listening. Any hissing means that air is being sucked into the stack through a puncture and requires taping to re-seal. Weights are needed to control the top sheet. As soon as enough Carbon Dioxide has been produced to release the rigid, perforated, stack pipe it needs to be removed and the hole needs to be sealed.
The stack needs to be monitored for the next two days. A large volume of Carbon Dioxide will be produced and can be released regularly to ensure the safety of the stack. The gases are hazardous if inhaled. The top sheet requires weights to control it as it inflates.
The pickling process is complete after two days and the final draining off of gas can occur. The clamp is now silage and needs to be re-sealed and weighted down and protected. Various covering can be used. Heavy butyl sheets, saw dust, tires, soil and other coverings have all been used. The principle is that the stack must remain sealed, without the risk of future punctures, and the sheet must be weighted down.
The way this is usually achieved in the Yalland system is to rotavate a 4 feet wide strip of soil to about 4 inch depth around the stack to produce fine clods. Soil is then heaped up onto the top sheet, or outer sheet, until the clamp is covered with enough depth and weight to ensure its security. About 4 inches depth of soil is needed. Stones are to be avoided because of risk of puncture. Wildlife will investigate the clamp. Livestock needs to be kept off it and that may require a fence.
When the silage is needed for feeding only strips of soil should be removed by hand at one time. About a four feet strip allows for silage to be used from one edge whilst keeping the rest of the clamp under load. This prevents air from getting into the rest of the stack. Preventing contamination of the silage at this stage is also important. Animals will not eat contaminated silage.
The used sheets will be waste, but the strip-seal can be re-used for many years.
Further notes on details
The Yalland system uses a three point mounted PTO gear box to run either the forage harvester or the self-unloading trailer. The take off has to be changed over twice for each trailer load to alternate between the harvester and the trailer. Care is required to ensure safety.
The self-unloading trailer improves on the traditional method of dumping and buck-raking. Keeping sheets intact when vehicles run over them is very difficult. The self-unloading trailer means that no vehicles cross the sheets at all. The speed of the unloading can be adjusted to suit the speed of the operator on the stack.
The vacuum pump can be anything that can be driven by a PTO shaft. Milking pumps and slurry tankers are among the possible pumps for this task, as shown in images on this website. The pump needs to be a high volume, low pressure unit that is resistant to corrosive gases and liquids. A vacuum gauge is needed to monitor the gas extraction.
Sheets and strip-seal need to work together. Sheet thickness can be 75 micrometre thick or up to 250 micrometre. Lighter sheets may require a thicker safety sheet over the top to protect the top sheet. Thicker sheets may not require a safety sheet. Safety sheets can be re-used for many years and do not have to be sealed. Only the bottom and top sheets need to be sealed. The original black polythene sheets in the 1960's were only 75 micrometre thick and that was too light for practical purposes. The Yalland system was using 125 micrometre thick black polythene sheets in 2002.
The strip-seal needs to match the sheet thickness so that a seal can be achieved, by hand, of two or four thicknesses of sheet. Strip-seal is an alkathene product that can be re-used for a few years. The core is a half inch tube and the outer clip is a three quarters round channel that clips around the core trapping and sealing the sheets between them (see images). It is pressed together by hand.
The quality of the sealing and repair tape needs to be air tight with polythene sheets and stable for a year in sunlight.
Weights can be simple clean used bags with a few spadefuls of soil in them. Tires are not recommended for environmental reasons.
Effluent is hardly produced at all if the process is followed carefully. What little there is can be drained from a bottom corner and absorbed by the soil. Effluent should not be allowed to reach water courses.
Waste silage hardly occurs at all if the process is followed carefully. Any waste can be composted and treated with other farmyard manure.
Waste sheets need to be contained and disposed of according to local authority rules.
Soil removed from the clamp is returned to the trench that it came from.
Opening the clamp to receive further layers of grass is not recommended. It is possible, but the difficulty of ensuring that the first silage is not spoilt and the additional layer is properly fermented makes this idea hazardous. If additional grass needs to be conserved then it is better to start a new stack.
Quality of Vacuum Compressed Silage
Dry matter of about 30 % is achieved mostly by the timing of flail harvesting and wilting. Rapid fermentation and preventing decay also contribute to maintaining dry matter percentage and avoiding effluent.
Acidity of about pH 3.9 to 4.2 is achieved by naturally produced lactic acid. Research has shown that the higher the sugar content of grass the lower the pH of the silage made from it (Lancaster 1960). Lancaster also found that vacuum silage more reliably produced desirably low pH even when sugar content was lower. Vacuum silage also consistently produced lower pH than other methods. More recently Kleinmans, 1996 has shown the value of natural lactic acid fermentation. In 2000 Oude Elferink published details of best fermentation and the effects of silage quality on animal health.
Wastage is reduced to less than 1 % if the process is followed carefully. Commercial studies found less waste with vacuum silage that other methods (Lancaster 1960). With experience and care the percentage wastage can be extremely low.
Targets for high quality silage from S W Howse (et al) 1996
Dry matter 30 % This quality depends on silage method
pH 3.5 – 4.5 This quality depends on silage method
Crude protein 16 – 20 % This quality depends on grass quality
Dry matter digestibility >70% This quality depends on grass quality
Beynon and Godsall (1966) found that Yalland silage clamps had pH in the range 3.9 to 4.3. Wilting was not used in the early days so the Dry Matter Percentage was 16.8 to 24.9 that year. This improved to 30 % when wilting became usual practice.
More recent research by Johnson (et al 2005) at Aberystwyth has shown that the greater the vacuum applied to sealed grass forage the quicker the drop in pH to about pH 4 and the quicker the production of lactic acid for pickling. This was a laboratory study and the link is below.
First Day Cut to Windrows

Second Day Collect Wilted Windrows (1)

Second Day Collect Wilted Windrows (2)

Unloading trailer to the Stack

Made Stack of Wilted Grass

Top Sheet and Stack Pipe

Pumping Down (1)

Pumping Down (2)

Pumping Down (3)

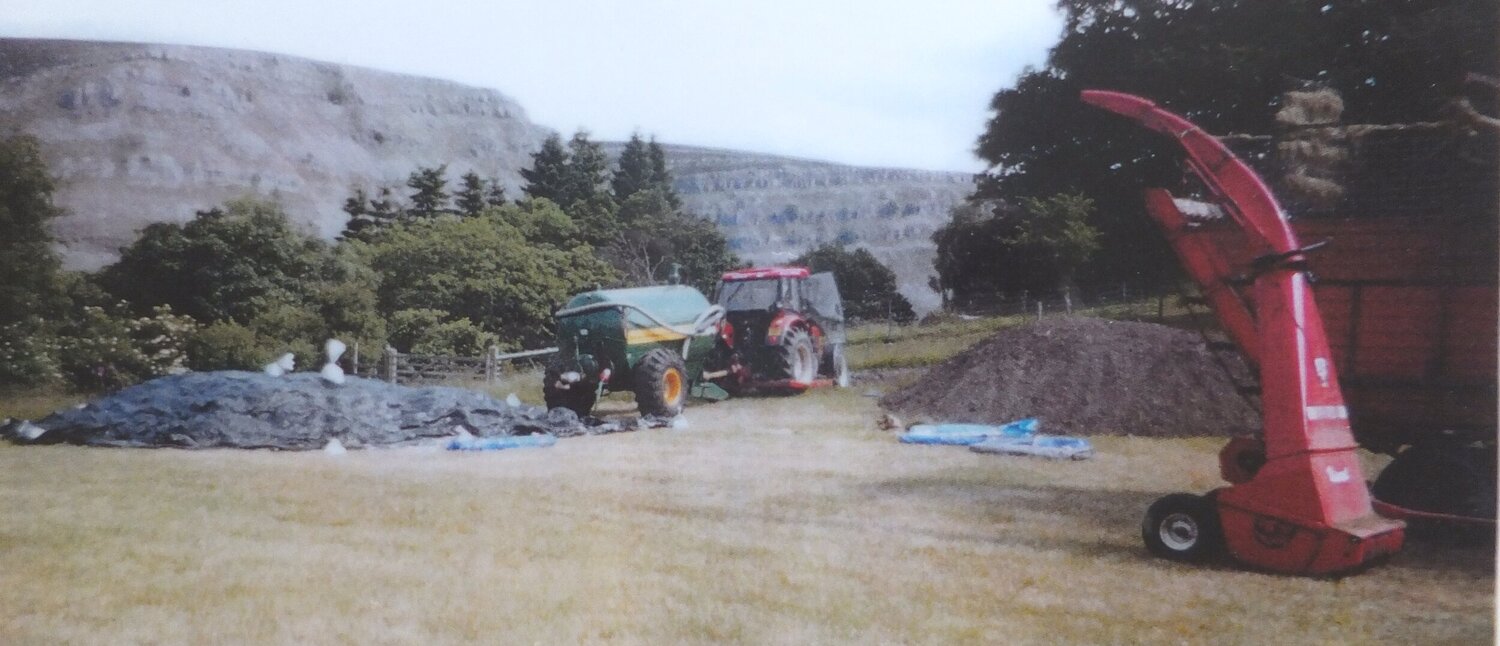
Sheeted and Ready for Pumping Down. Also showing a soil covered stack made earlier and other equipment.

Same view after Pumping Down. Also showing a soil covered stack made earlier and other equipment.

Fully Evacuated Clamp (Day 3) next to Carbon Dioxide Inflated Clamp (Day 4)

Carbon Dioxide Inflated Clamp (Day 4) next to Earthed Up Clamp (Day 5)

Ready for Soil Covering

Using Silage in Strips. (Silage knife on the Clamp) (Strip-seal showing on the Right)

Zero Wastage. Zero Effluent on Bottom Corner. 100 % Usable for Livestock.

Silage Carting to Livestock. (Other Soil Covered Clamps Behind)

Silage Carting to Livestock. (Fossil Fuel Free Method)

Strip-Seal (1).

Strip-Seal (2) Clamping and Sealing Plastic Sheets.

Forage Trailer and Gearbox..

Power Take Off (PTO) Train.

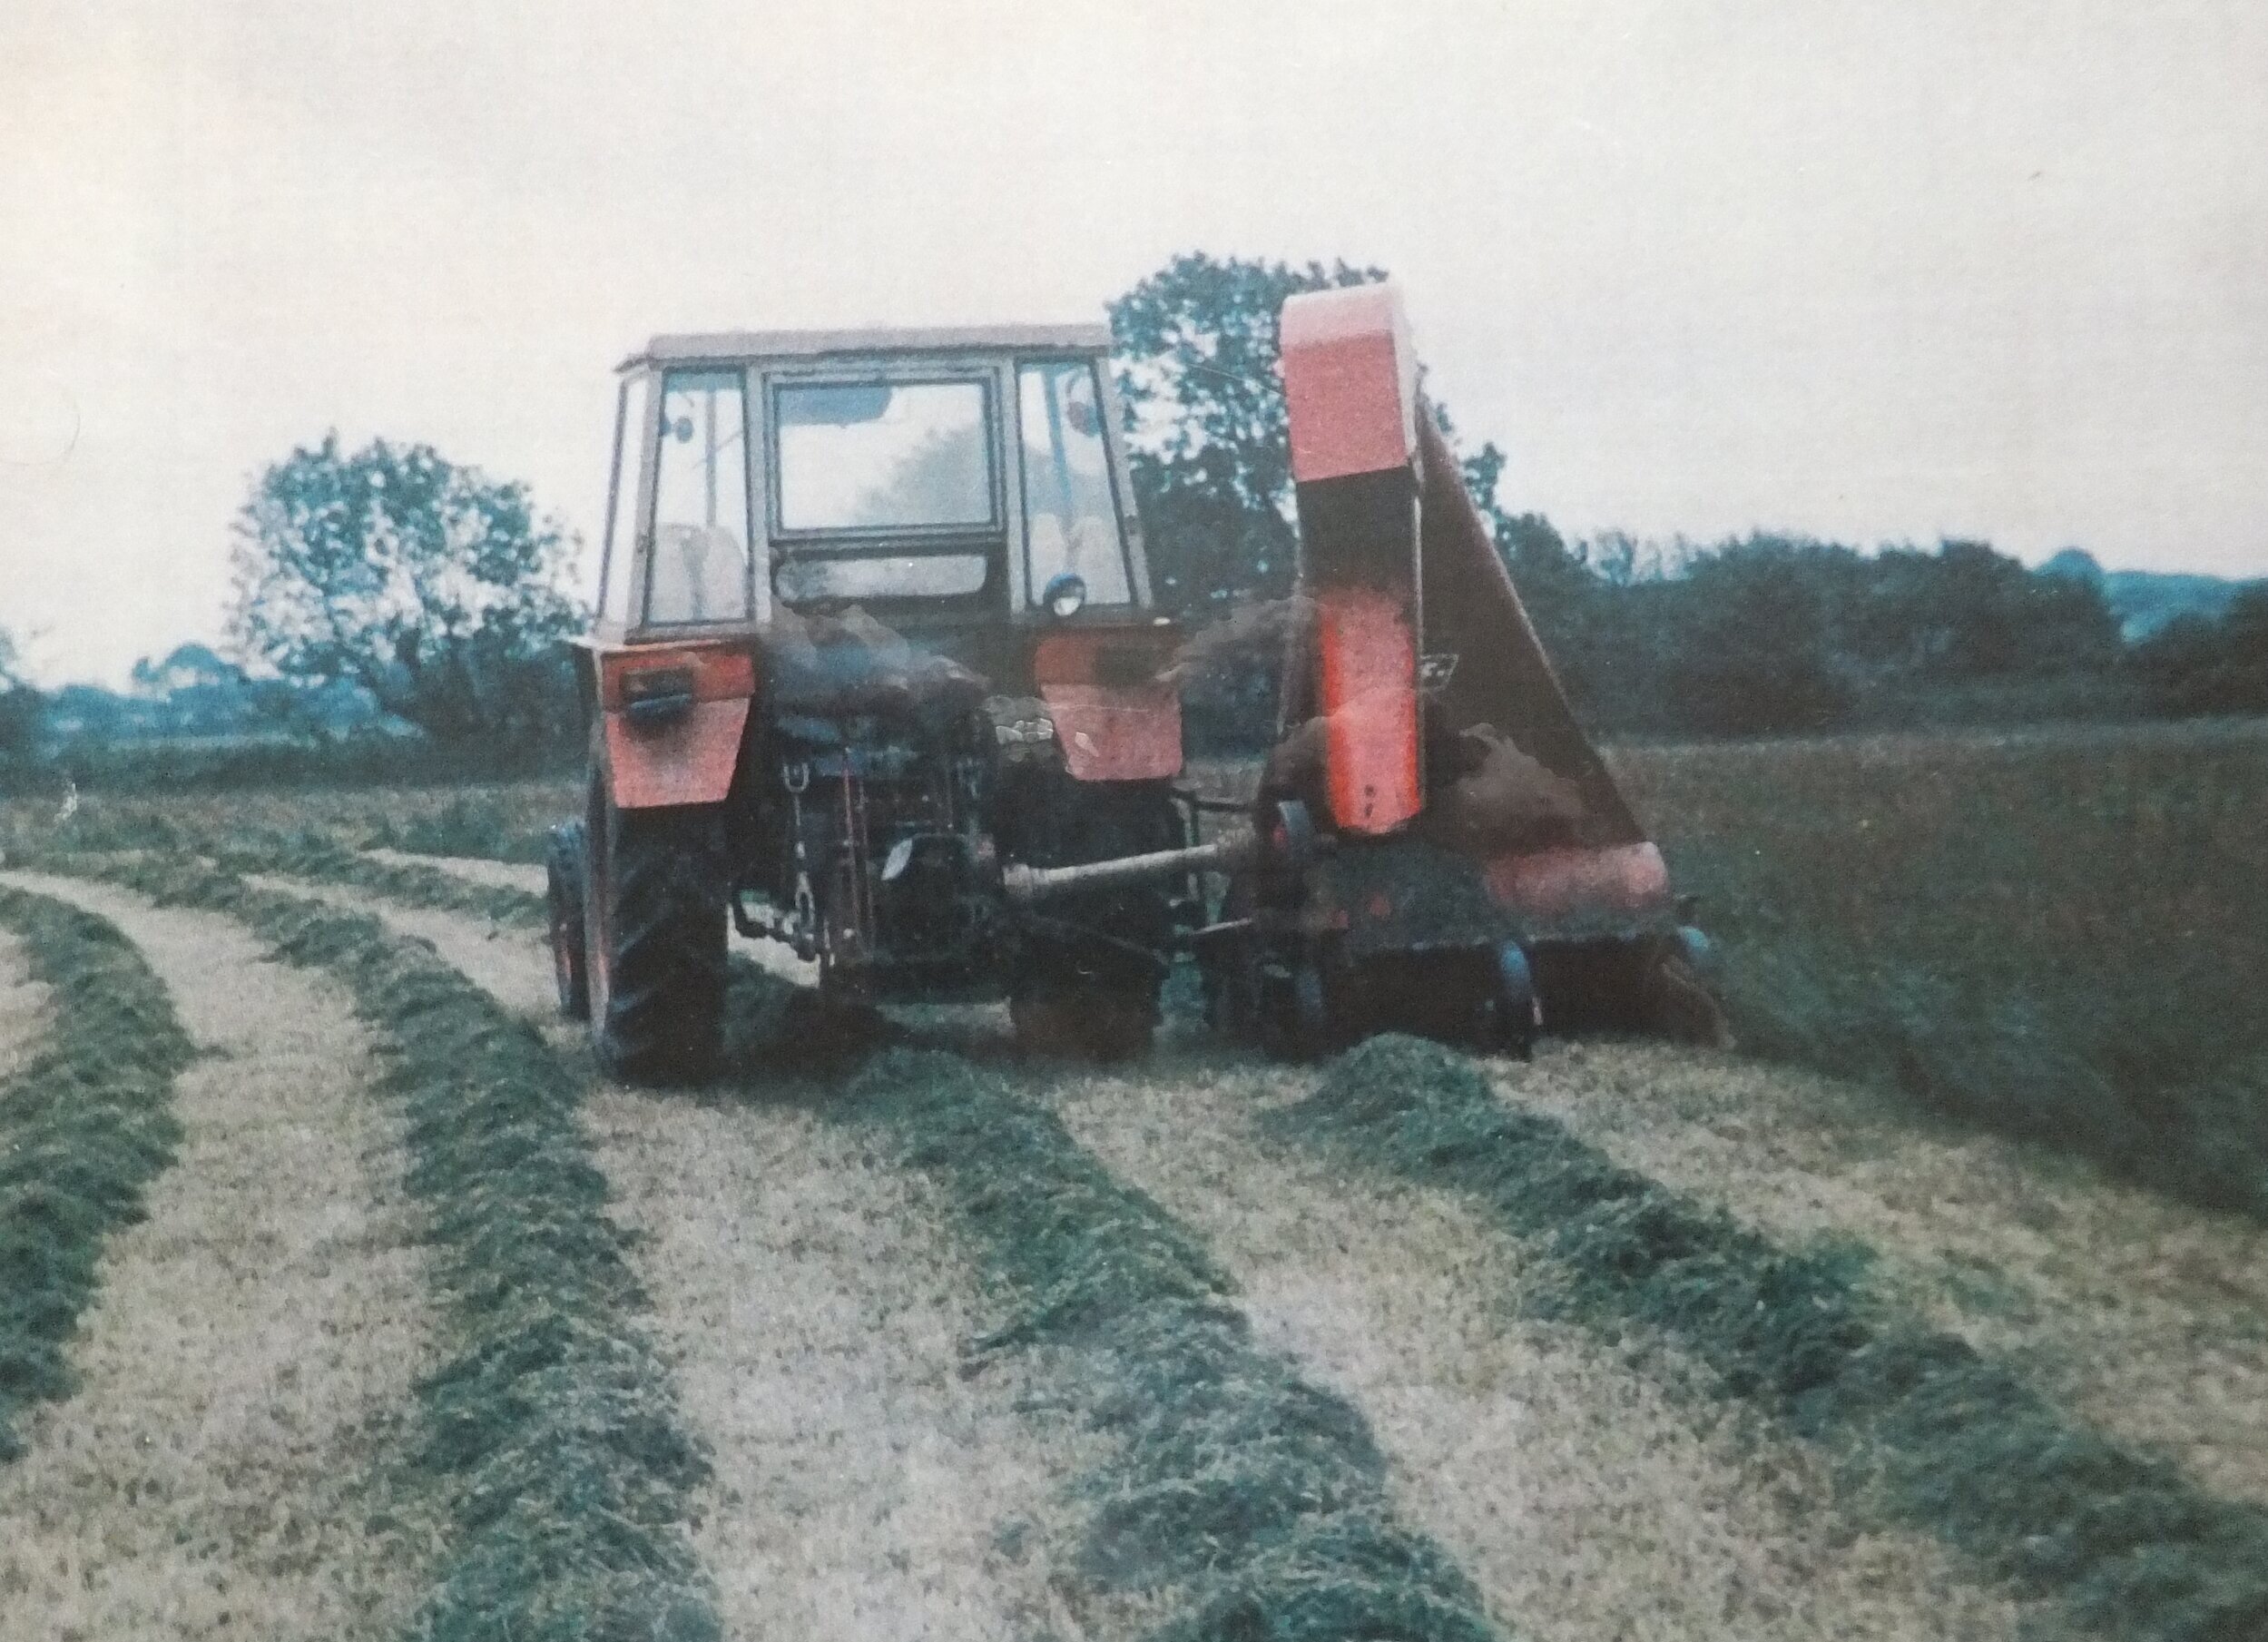
Flail Forage Harvester with Direction Spout.
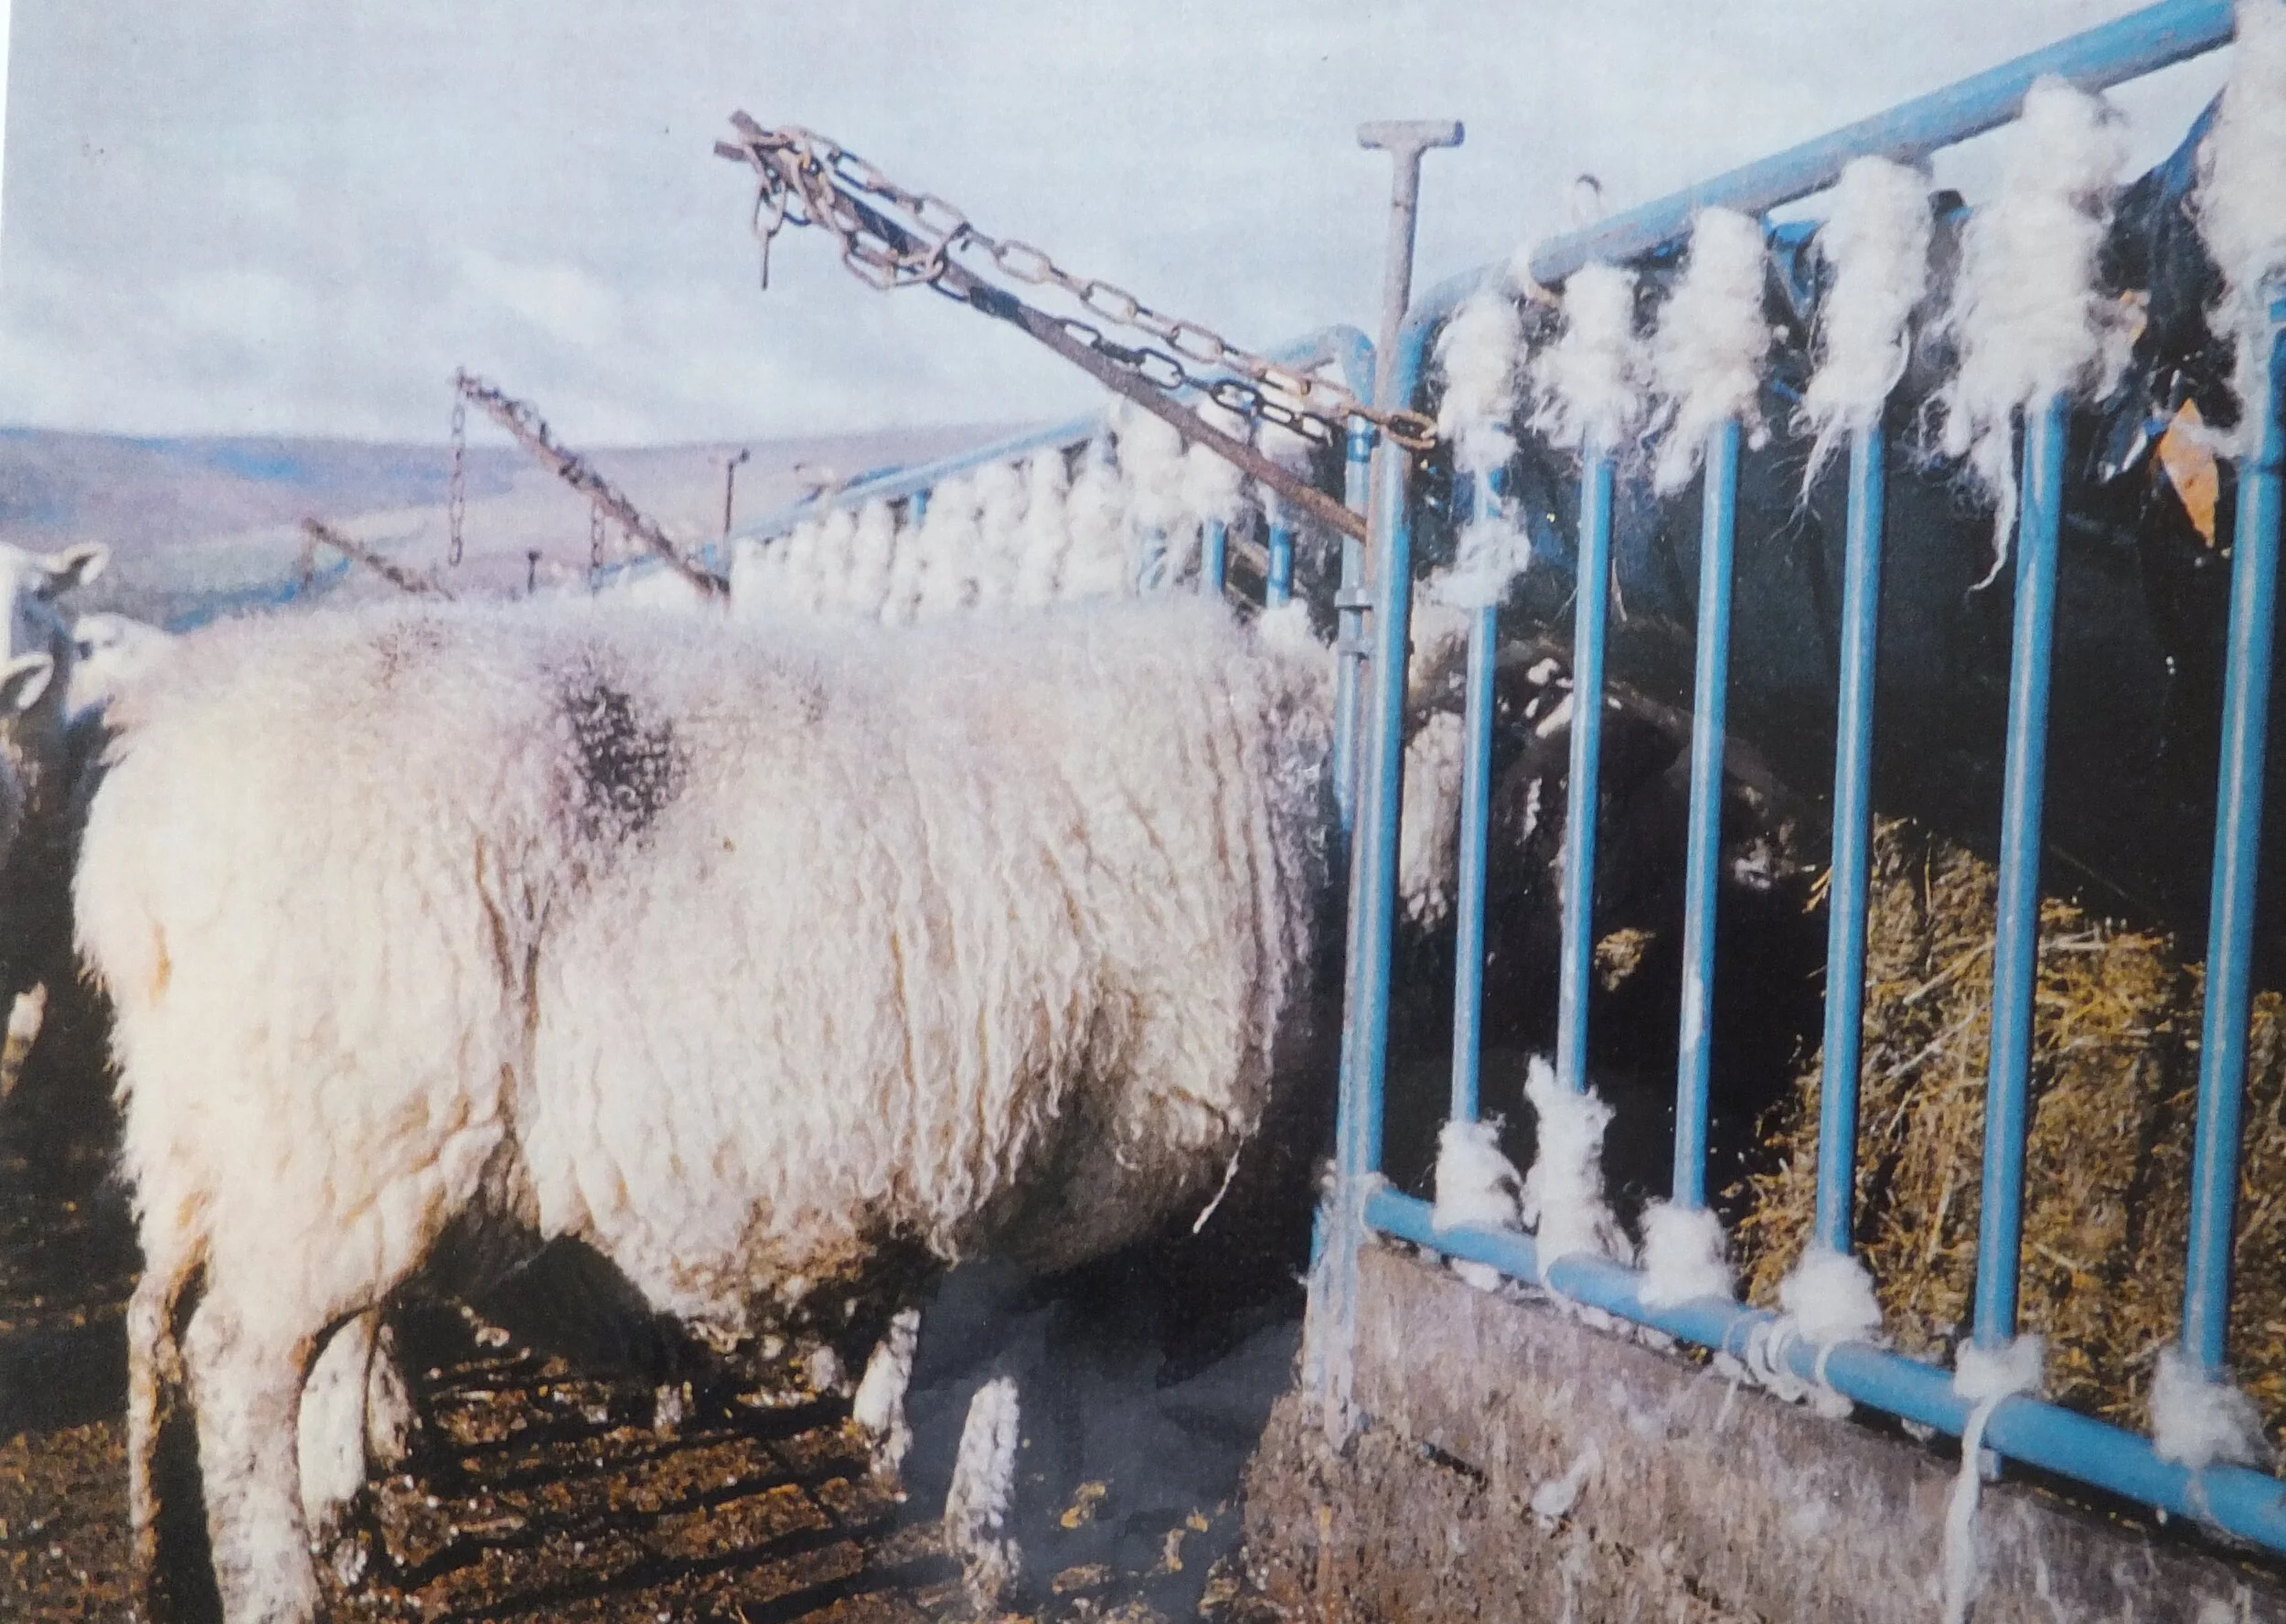
Outside Self-Feeding Sheep.

Feeding Sheep Inside.

Zero Wastage through the Whole Clamp by Using in Strips.
Links to publications
Beynon and Godsall, 1966 (NB The Yalland clamps are in table “N” Code no. 11 on page 45)
http://ageconsearch.umn.edu/record/260446/files/exeter-012.pdf
Lancaster, 1960 http://www.nzsap.org/system/files/proceedings/1960/ab60010.pdf
Kleinmans, 2016 https://www.semanticscholar.org/paper/A-review-of-silage-inoculants-in-the-New-Zealand-Kleinmans/7ac94ebc793598539c3f07ffbb2961a3e1733cc3
Oude Elferink 2000 http://www.fao.org/3/x8486e/x8486e09.htm
Oude Elferink 2000 https://www.researchgate.net/publication/12240949_The_impact_of_the_quality_of_silage_on_animal_health_and_food_safety_A_review
Johnson (et al) 2005 Journal of Microbiology 2005, 98, pp 106 - 113 https://users.aber.ac.uk/gwg/pdf/JohnsonGriffith-Vacpack.pdf
Vacuum silage in NZ 1999 featuring the “Lacerator “ harvester on three point linkage. One man system article in the “Farm Show” magazine.
https://www.farmshow.com/a_article.php?aid=12699
Further Information
If there is further information required then please use this dedicated email address. It should be answered within one week